MATERIALS:
-2 pieces of birch plywood (15 3/8" x 10")
-2 small hinges with screws
-screwdriver
-neon string (1 yard)
-3 1/2"drill bit (these can be pricey, but can be used for multiple projects)
-1/16" drill bit
-150 grit sandpaper (not shown)
-power drill (not shown)
STEP 1: Mark where the center of each circle will go, using a straight edge and a pencil. For reference, the ones shown here are 1 1/2" from the sides and 1" from the top and bottom. Also, each circle edge is 3/4" apart from one another. It might be helpful to use a protractor for this step to ensure the complete circles are spaced how you would like them to appear. Just use a pencil and erase after drilling if needed. *Please note that the drill bit will itself shave off some of the measurement, meaning the drill bit itself takes up some space, so the top margin might be a little less than 1" when finished, etc. This is a DIY project, not a professional piece.
STEP 2: Using the power drill with the 3 1/2" drill bit attached, drill six holes into each piece of plywood, making a total of 12 holes. 6 on each sheet of wood.
STEP 3: With the 150 grit sand paper, smooth any rough edges created from the drill.
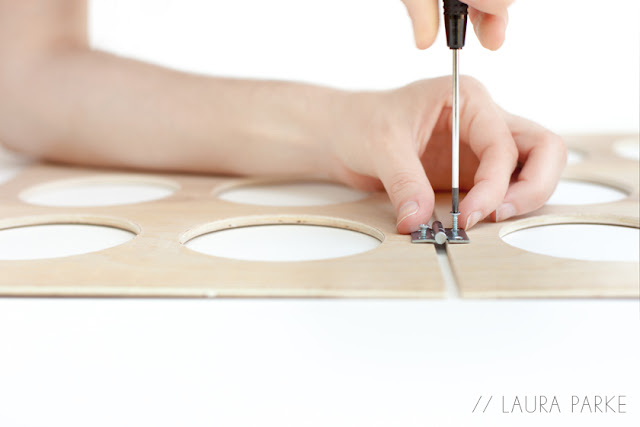
STEP 4: Measure for the hinges. Here, I measured to the center of the hole. Install one side of the hinge. Matching up the second piece of wood, secure the other side of the hinge.
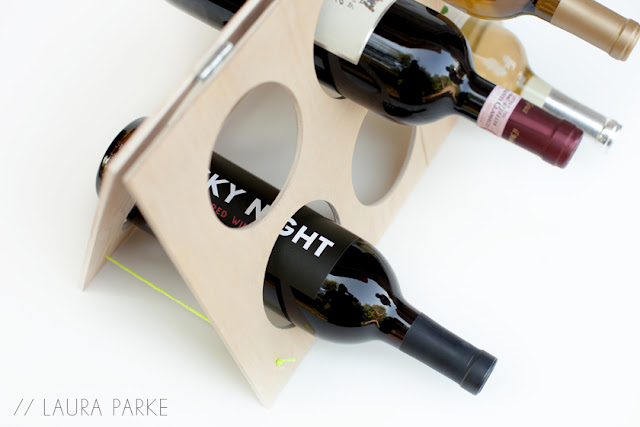
STEP 5: Set up the wine rack in an "A" frame manner, leaving the opening to about 6" wide.
STEP 6: Measure 1" in from the side and bottom and mark with a pencil. Using the 1/16" drill bit, drill a hole into each of the four corners that make up the bottom of the wine rack.
STEP 7: Using the neon string (10-12" should be enough), loop it through one of the holes and tie a double knot to secure it.
STEP 8: Take the other end of the string and loop it through the opposite hole and tie it in a double knot, making sure the opening is 6" when stretched to it's capacity. Trim the excess string. Do this same step to the other side and you're all finished!
Set your wine rack upright and load it up.


Please double check your measurements. Three 3.5 inch diameter holes, plus 1 inch between with 1.5 inch edge margins requires a board 15.5 inches in length. And I believe your photos don't match either as your photo in step 1 with the T-Square shows your hole center at 3.5 inches which would leave a 1.75 inch edge margin. Perhaps you took some creative liberties with hole spacing as I intend to, but please document it as such!
ReplyDeletei'm sorry for the mess up. the measurements should be as follows. the board should measure 15 3/8" wide. the 3 1/2" drill bit makes a hole 3 5/8" in diameter. and the holes are 3/4" apart instead of 1" with the side margins being 1 1/2" each. i hope this make more sense. i will update the directions above and if you have more questions please email me at agirlwhomakes@yahoo.com
Deletecan you give the measurements of the hole centers? what are the LxWxH of the baords? 15 3/8 x 10 1/2 is correct? what is the width you used...1/4 or 1/2?
ReplyDeletethanks
As noted above, the directions have been changed to the boards measuring 15 3/8" x 10". I used boards that were 1/4" thick. Please email me and consider not using anonymous for further questions or concerns please. agirlwhomakes@yahoo.com
Deletethis is such a good idea!
ReplyDeletethank you, kate!
DeleteYes, I can also make it. Thanks for making it very easier and a diy job for us. It is very simple yet looking very unique. Wow, design is very precise and clean.
ReplyDeleteLove this! Such a smart and elegant solution, with clear instructions.
ReplyDelete